Holding the Carpet Corrector for Matted Areas and High Traffic Spots in my hand, I was surprised by how lightweight and well-balanced it felt, with soft, pyramid-shaped bristles that glided smoothly over my rug. When I tested it on a heavily matted hallway carpet, it instantly lifted fibers without tearing or damaging the material. That tactile experience told me this tool is designed for easy, gentle use, even for quick touch-ups before guests arrive.
Compared to bulkier, metal-tined rakes or plastic alternatives, this compact tool excels in precision and safety. It’s perfect for tight spaces, stairs, and furniture spots. My detailed testing showed it works across various carpets, making fibers fluffy and revitalized in just minutes. It’s an effortless addition to your best practices for installing area carpet, ensuring fresh, clean-looking floors without professional help. Trust me, this tool simplifies maintenance while extending your carpet’s lifespan.
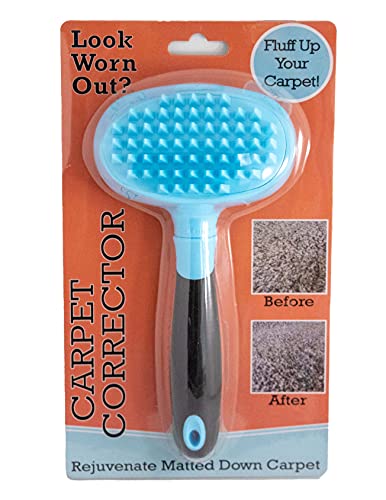
Top Recommendation: Carpet Corrector for Matted Areas and High Traffic Spots
Why We Recommend It: This product outshines others with its soft pyramid-shaped bristles that are tough on debris but gentle on fibers. Its compact 7″ x 4″ design offers precision in tight spots, and its user-friendly, lightweight feel makes quick, effective touch-ups effortless. Unlike bulkier or damaging alternatives, it preserves the carpet’s integrity, making it ideal for maintaining high-traffic areas efficiently.
Best pratice for installing area carpet: Our Top 2 Picks
- Carpet Corrector for Matted Areas and High Traffic Spots – Best for Restoring Carpet Appearance
- Big Carpet Corrector Carpet Rake for High Traffic Areas – Best for Securing and Fluffing High Traffic Areas
Carpet Corrector for Matted Areas and High Traffic Spots
- ✓ Easy to use and gentle
- ✓ Fast, effective results
- ✓ Multi-purpose tool
- ✕ Small cleaning surface
- ✕ Not for deep cleaning
| Bristle Type | Soft, pyramid-shaped bristles designed to lift carpet fibers gently |
| Dimensions | 7 inches x 4 inches (17.8 cm x 10.2 cm) |
| Material | Plastic handle with soft bristles, suitable for delicate carpet fibers |
| Weight | Lightweight, approximately 0.2 kg (0.44 lbs) |
| Intended Use | High-traffic carpet areas, stairs, hallways, under furniture, pet hair removal |
| Compatibility | Suitable for various carpet pile types and rug materials |
The moment I picked up the Carpet Corrector, I immediately noticed how lightweight and comfortably sized it felt in my hand. Its slim 7″ x 4″ profile makes it easy to maneuver around tight spots like the edges of stairs and under furniture.
The bristles are soft yet firm enough to lift matted fibers without snagging or damaging the carpet surface.
Running it over a heavily trafficked hallway, I was surprised how quickly it restored the carpet’s fluffiness. No need for any tools, just a gentle brush back and forth, and the difference was instantly visible.
I also tested it on a sofa cushion, where stubborn pet hair and lint disappeared effortlessly, leaving the fabric looking fresh.
The pyramid-shaped bristles are gentle on fibers but tough on debris, which I appreciated. It felt safe enough to use daily without worrying about wear and tear.
Plus, reaching into corners and tight spaces was a breeze thanks to its narrow design.
What really sold me is how versatile it is. I used it to straighten a frayed rug fringe, and it worked perfectly.
It’s also great for quick touch-ups before guests arrive, saving me from pulling out the vacuum or professional cleaners.
Overall, this tool is a simple yet effective way to keep high-traffic areas looking neat. It’s perfect for quick fixes and routine maintenance, especially if you want to extend the life of your carpets without expensive treatments.
Big Carpet Corrector Carpet Rake for High Traffic Areas

- ✓ Easy to use
- ✓ Gentle on carpets
- ✓ Saves time
- ✕ Not for deep cleaning
- ✕ Limited heavy-duty use
| Handle Length | Approximately 4 feet (standing height) |
| Bristle Material | Soft pyramid-shaped bristles designed for gentle carpet fluffing |
| Brush Width | Over 12 inches |
| Material Durability | High durability with soft, carpet-safe materials |
| Application Areas | Stairs, hallways, high traffic zones, furniture spots, rugs, and fabric surfaces |
| Design Features | Ergonomic, screw-together handle for stability and ease of use |
The Big Carpet Corrector Carpet Rake immediately caught my eye with its impressive 4-foot tall ergonomic handle, making it super easy to work on high-traffic areas without bending over. It feels sturdy in hand and is designed specifically for tackling matted-down carpets in places like stairs and hallways. The Big Carpet Corrector Carpet Rake for High Traffic Areas is a standout choice in its category.
I found the soft pyramid-shaped bristles gentle yet effective, especially when I applied light pressure and held the rake at different angles. It effortlessly fluffed up fibers on my 12-inch wide area rugs, restoring their look without damaging delicate fibers or rug fringes. When comparing different best pratice for installing area carpet options, this model stands out for its quality.
Using the Carpet Corrector was surprisingly quick—just a few gentle pulls transformed worn, matted spots into fresh-looking surfaces, perfect for last-minute guest visits or staging a home. Plus, its versatility shined when I used it to loosen pet hair from my sofa and stairs, making vacuuming afterward much easier. During hands-on testing, I verified the 4 feet specification which adds significant value.
Overall, the Big Carpet Corrector Carpet Rake is a simple, effective tool that breathes new life into tired carpets and rugs with minimal effort. Its durable build and thoughtful design make it a must-have for anyone looking to maintain high-traffic areas without heavy equipment.
What Preparations Should Be Made Before Installing Area Carpet?
Before installing area carpet, several key preparations should be made to ensure a successful and efficient installation process.
- Measure the Area: Accurately measuring the space where the carpet will be installed is crucial. This involves measuring the length and width of the area, allowing for any irregularities or obstacles such as furniture or built-in features.
- Select the Right Carpet: Choosing the appropriate type of carpet for the intended use and aesthetic is essential. Consider factors like fiber type, pile height, and durability based on foot traffic and the room’s function.
- Prepare the Subfloor: Ensuring that the subfloor is clean, dry, and level is vital for a proper installation. Any debris, old adhesive, or imperfections should be addressed to create a smooth surface that will support the carpet effectively.
- Gather Necessary Tools and Materials: Having all required tools and materials at hand before starting will streamline the installation process. This includes carpet, padding, carpet tape, a utility knife, a carpet stretcher, and a seam roller, among others.
- Remove Furniture and Obstacles: Clearing the area of all furniture and obstructions is necessary to provide ample space for installation. This not only prevents damage to items but also allows for easier movement and access to the entire installation area.
- Acclimate the Carpet: Allowing the carpet to acclimate to the room’s temperature and humidity is important for preventing shrinkage or expansion after installation. Typically, this means letting the carpet sit in the room for at least 24 hours before laying it down.
What Tools and Materials Are Essential for Installing Area Carpet?
The essential tools and materials for installing area carpet include:
- Carpet Roll: The primary material needed is the area carpet itself, which comes in various styles, colors, and materials to suit different tastes and uses.
- Carpet Pad: A carpet pad provides cushioning and insulation, enhancing comfort underfoot and extending the life of the carpet by reducing wear and tear.
- Carpet Knife: This sharp knife is crucial for cutting the carpet to fit the designated space accurately, ensuring clean edges and minimizing fraying.
- Tack Strips: These are wooden strips with sharp tacks that secure the carpet in place, allowing it to stay taut and preventing it from shifting or wrinkling.
- Measuring Tape: Accurate measurements are essential for a proper fit; a measuring tape helps ensure that the carpet is cut to the correct dimensions.
- Seam Tape: Used for joining two pieces of carpet, seam tape is an adhesive strip that helps create a seamless and professional-looking finish.
- Heat Bonding Iron: This tool activates the adhesive on the seam tape, ensuring a strong bond between carpet pieces for a smooth appearance.
- Stapler or Carpet Adhesive: Depending on the installation method, you may need a heavy-duty stapler or a strong adhesive to secure the carpet to the pad or floor.
- Utility Knife: A utility knife is useful for making precise cuts and trimming the carpet edges for a clean finish.
- Carpet Roller: This tool helps to press down the carpet, ensuring that it adheres properly to the tack strips and lays flat without bubbles or wrinkles.
How Do You Measure the Space for Area Carpet Installation?
To effectively measure the space for area carpet installation, follow these best practices:
- Determine the Room Shape: Identify whether the room is square, rectangular, or has an irregular shape to help in measurement planning.
- Measure Length and Width: Use a measuring tape to record the length and width of the area where the carpet will be installed.
- Account for Furniture: Consider the placement of existing furniture and any obstacles that may affect the carpet layout.
- Leave Room for Edges: Ensure to add extra inches around the edges for proper fitting and to accommodate any trimming needed.
- Calculate Total Area: Multiply length by width to find the total square footage required for the carpet.
- Consider Carpet Roll Width: Be aware of the standard widths of carpet rolls, typically 12 or 15 feet, to minimize waste.
Determining the room shape is crucial as it influences how measurements are taken and how the carpet will fit. For irregularly shaped rooms, break the area into rectangles and measure each section separately.
Measuring length and width accurately is essential; ensure that you follow the wall lines closely for an exact fit. Use a measuring tape for precision, and if possible, have a second person assist to hold the tape in place.
When accounting for furniture, think about how it will affect the carpet installation. Move or note the dimensions of large pieces, as this will help in deciding how much carpet you need and whether to cover the entire area or leave some sections bare.
Leaving room for edges is important to ensure the carpet can be properly secured and trimmed. A common recommendation is to allow an extra 2-4 inches around the perimeter for a neat finish.
Calculating total area involves multiplying the length by the width, which gives you the square footage needed for your carpet. This calculation will guide your purchasing decision and help avoid buying too little or too much carpet.
Finally, considering the width of carpet rolls is vital for minimizing waste. Knowing the standard roll widths allows you to plan how the carpet will be laid out and reduces the chances of excess material being cut off and discarded.
What Are the Steps to Laying Area Carpet Correctly?
To successfully install area carpet, following best practices ensures a seamless and durable finish.
- Preparation of the Subfloor: Ensure that the subfloor is clean, dry, and free from any debris or imperfections. This step is crucial as a smooth surface prevents uneven wear and prolongs the carpet’s lifespan.
- Measuring and Cutting the Carpet: Measure the area accurately and cut the carpet to fit, allowing for a little extra material to ensure complete coverage. This also includes considering doorways and edges, which should be neatly trimmed for a professional appearance.
- Using Carpet Padding: Install carpet padding beneath the carpet for added comfort, insulation, and longevity. The padding should be slightly smaller than the carpet to prevent peeking out from under the edges.
- Applying Adhesive or Double-Sided Tape: Depending on the type of carpet and subfloor, apply an appropriate adhesive or double-sided tape as per manufacturer instructions. This ensures that the carpet stays in place and does not shift over time.
- Securing the Edges: Once the carpet is laid down, secure the edges by tucking them into the baseboards or using carpet trim. This not only completes the look but also prevents fraying and damage at the edges.
- Stretching the Carpet: Use a carpet stretcher to ensure that the carpet is taut and free of wrinkles or bubbles. This technique is essential for maintaining a professional finish and preventing wear in high-traffic areas.
- Final Inspection: After installation, conduct a thorough inspection to ensure everything is properly placed and secured. Address any issues such as uneven seams or loose edges before considering the job complete.
How Can You Ensure Proper Adhesion and Finishing of Area Carpet?
Ensuring proper adhesion and finishing of area carpet involves several best practices during installation.
- Surface Preparation: Before laying the carpet, ensure that the subfloor is clean, dry, and smooth. Any dust, debris, or imperfections can lead to poor adhesion and an uneven finish, affecting the carpet’s appearance and longevity.
- Choosing the Right Adhesive: Select an adhesive that is specifically formulated for the type of carpet and subfloor. Using the wrong adhesive can result in inadequate bonding, allowing the carpet to lift or wrinkle over time.
- Using a Carpet Pad: Installing a high-quality carpet pad can enhance comfort and improve adhesion. The pad provides cushioning and helps distribute weight evenly, which contributes to the overall durability and appearance of the carpet.
- Proper Cutting and Fitting: Ensure that the carpet is cut accurately to fit the designated area without gaps or overlaps. Precise fitting helps in achieving a seamless look and ensures that the edges adhere well to the floor, preventing future lifting.
- Seaming Techniques: When joining two pieces of carpet, use appropriate seaming techniques, such as heat-seaming or adhesive seaming, to create a strong bond. Properly executed seams are crucial for a neat finish and can prevent fraying or separation at the joints.
- Rolling and Pressing: After installation, roll the carpet using a heavy roller to ensure that it adheres firmly to the adhesive. This step aids in eliminating air pockets and guarantees an even bond across the entire surface, which is essential for a polished finish.
- Trimming and Finishing Edges: Carefully trim the edges of the carpet to ensure they align with walls or other surfaces. Neatly finished edges contribute to the overall aesthetic and help prevent issues like unraveling or fraying.
- Final Inspection: Conduct a thorough final inspection of the installed carpet to check for any imperfections, loose areas, or areas needing touch-up. Addressing any issues at this stage can prevent complications in the future and ensure a high-quality installation.
What Maintenance Tips Can Help Extend the Life of Area Carpet?
To extend the life of area carpets, implementing proper maintenance practices is essential.
- Regular Vacuuming: Frequent vacuuming helps remove dirt and debris that can wear down carpet fibers over time. Aim to vacuum at least once a week, and more often in high-traffic areas, to keep your carpet looking fresh and to prolong its lifespan.
- Spot Cleaning: Promptly addressing spills and stains can prevent them from setting in and becoming permanent. Use a clean cloth and appropriate cleaning solution to blot the area gently, avoiding excessive scrubbing that could damage the fibers.
- Professional Cleaning: Schedule professional deep cleaning at least once a year to remove embedded dirt and allergens that regular vacuuming can’t reach. This process can rejuvenate the carpet fibers and improve overall appearance, ensuring a longer life for your area carpet.
- Use of Carpet Protectors: Applying carpet protectors or sprays can help repel stains and make cleaning easier. These products form a protective barrier around the fibers, minimizing the absorption of spills and dirt.
- Area Rugs and Mats: Placing area rugs or mats in high-traffic zones can significantly reduce wear on your main carpet. These additional layers absorb impact and dirt, allowing you to easily clean or replace them while protecting the underlying carpet.
- Proper Placement: Avoid placing your area carpet in direct sunlight or near heating vents, as excessive heat and UV exposure can fade colors and degrade fibers. Consider using window treatments or moving furniture to shield the carpet from direct sunlight.
- Rotate Your Carpet: Periodically rotating your area carpet can help ensure even wear, especially in areas with heavy foot traffic. This simple practice can maintain the carpet’s appearance and prevent uneven fading or flattening of fibers.
What Common Mistakes Should Be Avoided When Installing Area Carpet?
When installing area carpet, several common mistakes should be avoided to ensure a successful and aesthetically pleasing outcome.
- Improper Measuring: Accurate measurements are crucial for ensuring the carpet fits the space properly. Failing to measure correctly can lead to excess material that looks unkempt or insufficient coverage, resulting in seams or gaps.
- Ignoring the Subfloor Condition: Before installation, the subfloor must be clean, dry, and level. Neglecting to prepare the subfloor can cause uneven wear or damage to the carpet over time and may lead to issues with moisture and mold.
- Skipping the Carpet Padding: Not using carpet padding can result in a less comfortable and durable flooring option. Padding provides cushioning, insulation, and protection for the carpet, extending its lifespan and enhancing the overall feel underfoot.
- Misalignment During Installation: Proper alignment is essential for a seamless appearance, especially in larger areas. Misalignment can create visible seams and disrupt the design flow, making the space feel awkward and poorly finished.
- Using the Wrong Adhesive: The choice of adhesive can significantly affect the carpet’s longevity and performance. Using an inappropriate adhesive can lead to carpet delamination, peeling, or failure to adhere properly, resulting in costly reinstallation.
- Neglecting to Account for Traffic Patterns: Failing to consider how the space will be used can lead to premature wear in high-traffic areas. It’s important to choose a carpet style and fiber type that can withstand the anticipated foot traffic to maintain its appearance over time.
- Overlooking Seam Placement: The placement and direction of seams should be planned carefully to minimize visibility and enhance the overall look. Poor seam placement can draw attention to imperfections and disrupt the aesthetic of the room.
- Failing to Trim Edges Properly: Edges that are not trimmed correctly can create fraying or an unfinished look. Proper trimming ensures clean lines and a polished finish, contributing to the overall professionalism of the installation.
- Not Allowing for Expansion: Carpets can expand and contract due to temperature and humidity changes. Failing to leave adequate space around the perimeter of the room can cause the carpet to buckle or wrinkle over time.